Overclocking Asus Eee PC 1215N with Intel Atom D525 and NVIDIA ION using NVIDIA System Tools and setfsb
WARNING! This post is purely informative and I in no way accept responsibility for what you do with your PC or any damage that may result from overclocking. Altering you PC configuration in such a way always has a certain risk of severe hardware malfunction.
Using NVIDIA System Tools and setfsb I managed to somewhat improve the performance of my Asus Eee PC 1215n and I would like to share step-by-step guide of how it is done.
First, you are going to need these free tools:
- setfsb (the latest free version I managed to find is 2.2.113.85): http://www13.plala.or.jp/setfsb/
- NVIDIA System Tools (moved to legacy support but is still available for download from nvidia.com): http://www.nvidia.com/object/nvidia-system-tools-6.08-driver.html
- Futuremark 3DMark (free version won't let you skip demos and run tests individually but will still do its benchmarking): http://www.futuremark.com/support/downloads
You might as well find this one useful since it has nice Overclock Information panel with OSD showing CPU, GPU and overall system environment temperature once the program is minimized to tray. It is free as well:
Once you have unpacked and installed all these tools (I don't expect any problems so far) you are good to go.
Pre-Benchmarking
Run 3DMark.
Free version doesn't offer much to choose or configure. It just runs the whole set of available tests and then shows you the result. So press Run Tests button, sit back and watch.

You may take note of real-time FPS counts during tests so you had some figures to compare to your overclocked performance on the go after, just not to be so bored.
After the tests are complete, 3DMark will launch your web browser with submitted results. At this point I would recommend logging in to Futuremark using Steam or Facebook account. This way it will store your current results in your profile and will store future results there as well along with detailed system configuration including CPU, GPU and memory clocks. So it will be pretty easy to compare the results once you satisfy your overclocking ambitions.
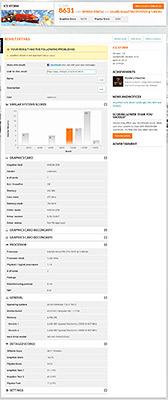
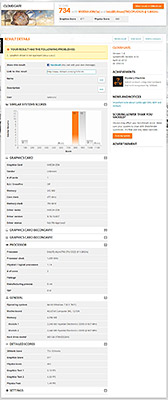
My initial score for two available tests at default clocks looked like this:
- Ice Storm — 8631: http://www.3dmark.com/is/419500
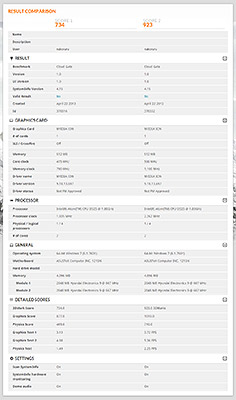
- Cloud Gate — 734: http://www.3dmark.com/cg/376516
I should note that I replaced original RAM right after the purchase, doubling it. If you still have 2Gb of RAM your results might be different even at this point.
Now that we have data to compare to, let's proceed to actual tinkering.
Overclocking CPU
First, I'd recommend to create a System Restore point, in case something goes utterly wrong with software settings but there still is no hardware damage.
Next, run setfsb.
Once it's running, you are to choose Clock Generator from dropdown list. According to http://www13.plala.or.jp/setfsb/, the generator code for Asus Eee PC 1215n is ICS9LPR427AGLF.
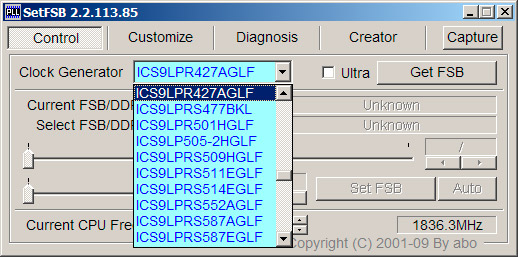
After you set the clock generator, press 'Get FSB' button.
In the right bottom corner of setfsb window you will see your current CPU frequency in MHz.
Now, use the top bigger slider to adjust the clocking.
I personally never got beyond of what is described in this post: http://forum.eeeuser.com/index.php?/topic/84026-1215n-overclocking/, i.e. 561 (though it gave me not 123, but 125mhz fsb frequency increase).
If you cannot set the exact figure using slider, you may finetune your setting with arrow buttons just next to the slider below set values. Once done, press 'Set FSB' button.
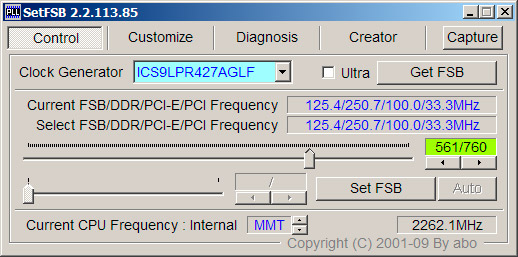
If nothing wrong happens right this instant, you are going to see your newly set current CPU frequency in right bottom corner of setfsb window.
At this point you might want to start paying attention to the system temperature because no overclocking goes without its increase. And you don't want it to get too high because in a better day your CPU with start intentionally skipping some calculations and thus decreasing its performance in order to maintain the appropriate temperature, and if it won't help the CPU would just perform an emergency system shut down. And if you are less lucky you may as well brick your precious little — and pretty obsolete, let's be honest — netbook.
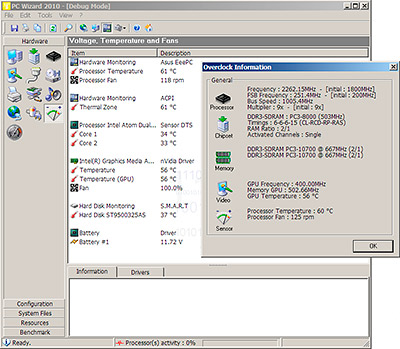
To check the temperature you may run PC Wizard and go to Voltage, Temperature and Fans panel. Or just click Overclocking Information button in the toolbar.
You might also find the OSD quite useful. Just minimize PC Wizard to tray to see it.
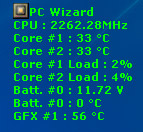
My CPU core temperature is usually at 39-40°C in idle state. The overall system temperature is around 60°C. I'm not sure it's optimal. What I recommend no matter if you are overclocikg or not is to vacuum the laptop's ventilation slot without disassembling it. Just run your vacuum cleaner (make sure it's set to dry clean!) and stick its tailpipe right to the slot to vacuum it thoroughly. In my case it once helped me get rid of tremendous overheating and performance lags so you should give it a try anyway. Might be as good as overclocking just by itself!
If your system is stable after CPU overclocking, you might want to avoid changing clocks each time you restart. The way is described in the abovementioned post: just make a shortcut with additional FSB clock parameters and place it into Startup folder of your Windows.
Oveclocking GPU
First, locate your .nsu configuration files.
By default they should be in C:\Users\%username%\AppData\Local\NVIDIA Corporation\nTune\Profiles
To confirm or change this location, run nvProfile from NVIDIA System Tools installation and select SETTINGS.
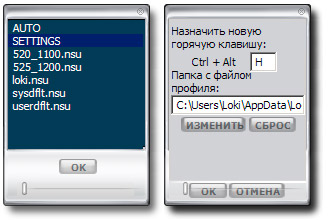
Once you located .nsu files (there are two sample files with default system settings), Ctrl+C any of them and Ctrl+V it into the same folder. Now rename the newly created file into something that will help you identify what it does in the list. I use GPU and VRAM clocks for naming. According to this, the config file that would set GPU clock to 520MHz and video memory clock to 1100MHz will be named 520_1100.nsu.
Open your configuration file in some plain text editor like Notepad. Scroll to the bottom to the string set under [GPUSettings] and locate GPUCOREMHZ0.
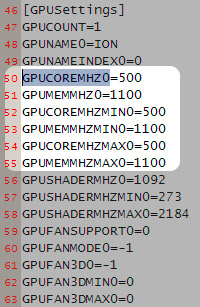
At this point I wasn't exactly sure what I was doing. I figured out that there are three sets of GPU and memory clocks that set minimum, normal and maximum clocks. So since I was (and still am) ignorant of details and just wanted top performance I set same values in all three pairs.
I recommend starting with GPU clock at 500MHZ and memory clock at 1100Mhz since it was the first (and only so far in my case) that was stable and gave my system a performance boost according to 3DMark.
Now save your .nsu file and run nvProfile again. You should see your configuration file in the list.
Choose it and press Ok button. The notification should appear that setting are now applied.
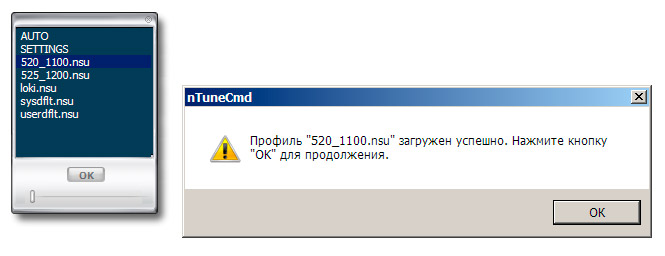
You should note that PC Wizard for some reason doesn't show any increase in GPU/VRAM clocks. But other tools will show your increased clocks. As well as 3DMark reports.
Once again, keep an eye on temperature readings.
Now it's time to remeasure.
Benchmarking
Run 3DMark.
When you run tests on an overclocked system be prepared to see graphic artifacts, video driver failures and BSODs. If something like that happens, reboot the system and apply the above steps again, this time treading a bit lighter on GPU/VRAM clocks (I'm pretty sure that CPU clock I recommend is pretty stable and most errors occured due to going easy on GPU/VRAM clocks). You may want to create a light version of your .nsu configuration with gentler clock steps.
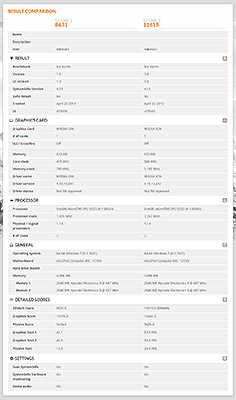
My first successful test that showed a performance boost was performed with these settings:
- CPU 2,262Mhz (default 1,835MHz)
- GPU 500Mhz (default 475MHz)
- VRAM 1100Mhz (default 790MHz)
It actually was the most performing one.
- Ice Storm — 11615: http://www.3dmark.com/is/419545
- Cloud Gate — 923: http://www.3dmark.com/cg/376552
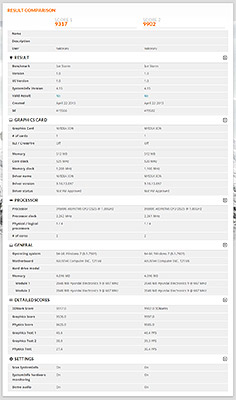
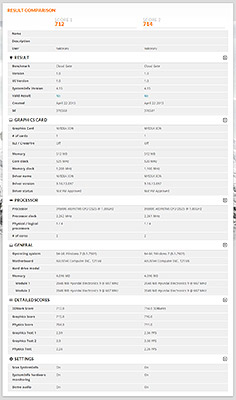
Surprisingly, at 525/1200 and 520/1100 (CPU clock remaining at 2,261-2,262MHz) the system showed similar to initial results in Ice Storm test and poorer result in Cloud Gate test. And the lower was the clocking, the higher was the score...
- Ice Storm (525/1200 vs. 520/1100) — 9317 vs. 9902: http://www.3dmark.com/compare/is/419566/is/419582
- Cloud Gate (525/1200 vs. 520/1100) — 712 vs. 714: http://www.3dmark.com/compare/cg/376568/cg/376581
I suspect that this might be due to ION feature that reloads the faltered driver and falls back to safe clocks once the driver stumbles upon some critical error. In fact, at the beginning of the test I did see a driver failure. That time the driver managed to recover by itself but it could actually fall back to safe clocks though 3DMark showed overclocked settings in its reports. If you have any thoughts to share concerning this matter please share in the comment section below express them somewhere but the comments are not available here anymore.
It would be also cool if you submitted your own stable settings: CPU/GPU/VRAM.
